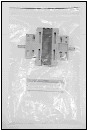
Follow the instructions in the CHANNEL-IN
(ES) manual to install the hardware. After you install the hardware,
you must run
hardware diagnostics. Depending on what parts of the hardware you want
to test, complete the following instructions.
See the following table for a description of the CHANNEL-IN (ES) hardware.
Hardware
Description
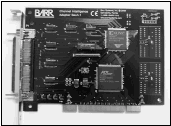
CHANNEL-IN
(ES) adapter – The CHANNEL-IN (ES) adapter allows your computer
to communicate with an ESCON channel.
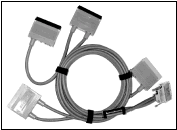
CHANNEL-IN
(ES) cable – The fiber-optic cable has two male connectors. One
end plugs into the adapter. The other end plugs into the mainframe or
an ESCON director.
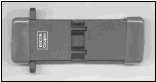
ESCON coupler
– The coupler has two female connectors. Before you can join two cables
or attach the ESCON loop plug to the cable, you must connect the coupler
to the cable to change the gender of the cable connector.
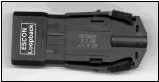
ESCON loop
plug – The ESCON loop plug has a male connector. Use the loop plug
to test the adapter and cable.
Installing
the CHANNEL INTELLIGENCE hardware
Follow the instructions in the CHANNEL
INTELLIGENCE Adapter manual to install the hardware. After you
install the hardware, you must run
hardware diagnostics. The Diagnostic Tools bag you receive with the hardware
contains instructions for installing the test plugs.
See the following table for a description of the CHANNEL INTELLIGENCE
hardware.
Hardware
Description
CHANNEL INTELLIGENCE adapter
– The CHANNEL INTELLIGENCE adapter allows your computer to communicate
with a parallel mainframe channel.
CHANNEL INTELLIGENCE cableand test plug – The cable is used
to connect the adapter to the mainframe channel. The CHANNEL INTELLIGENCE
adapter test plug arrives strapped to the CHANNEL INTELLIGENCE cable.
CHANNEL INTELLIGENCE test
plugs – The terminator plugs and test plugs arrive in the Diagnostic
Tools bag.
Installing the
CHANNEL-IN (BT) hardware
Follow the instructions in the CHANNEL-IN
(BT) manual to install the hardware. After you install the hardware,
you must run
hardware diagnostics. The Diagnostic Tools bag you receive with the hardware
contains instructions for installing the test plugs on the CAB.
See the following table for a description of the CHANNEL-IN (BT) hardware.
Hardware
Description
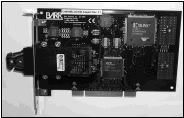
CHANNEL-IN (BT) adapter
– The CHANNEL-IN (BT) adapter allows your computer to communicate with
a parallel mainframe channel.
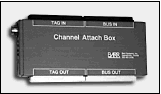
Channel Attach Box (CAB)
– The CAB allows channel-attached devices to connect to the mainframe.
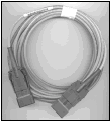
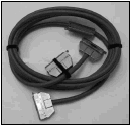
CHANNEL-IN (BT) cable
– The cable is used to connect the adapter to the CAB. The adapter test
plug arrives strapped to the CHANNEL-IN (BT) cable. The test plug is embossed
TEST.
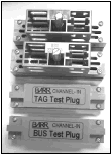
CHANNEL-IN (BT) test plugs
– The terminator plugs and test plugs arrive in the Diagnostic Tools bag.
Installing the device driver
Windows 2000 or Windows XP will automatically detect the hardware and
install the device driver for you. Although you can manually configure
device properties and settings, you should let Windows do it. When you
manually configure properties and settings, the settings become fixed,
which means Windows cannot modify them if a problem arises or there is
a conflict with another device. After you have installed the software,
complete the following steps for your operating system.
If Windows 2000 or Windows XP do not detect
the CHANNEL-IN device, you may have to use the Add/Remove Hardware utility
in the Control Panel to tell Windows what type of device you are installing.
See the Microsoft Help for additional information.
Windows 2000
After you've installed
the CHANNEL-IN hardware, turn on your computer.
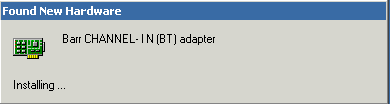
The Found
New Hardware dialog box displays. When the dialog box closes, installation
is complete.
Windows XP
Windows Server
2003 users –
Because of a change in default behavior in Windows Server 2003, users
must explicitly enable the ability to add kernel-level drivers required
to access to Barr printer drivers. See the Support
for Windows Server 2003 topic for more information.
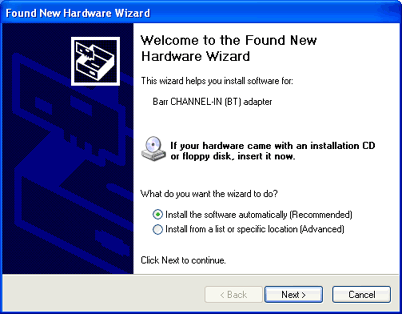
After you've installed
the CHANNEL-IN hardware, turn on your computer. Windows displays a message
that the Device Manager is scanning for Plug and Play compliant hardware,
and then the Found New Hardware Wizard opens.
Select Install
the software automatically and click Next.
Windows will search for the software and then install the appropriate
device driver. Once Windows has successfully located and installed the
appropriate device driver, a dialog box will confirm that the Found New
Hardware Wizard has finished installing the software.


 If Windows 2000 or Windows XP do not detect
the CHANNEL-IN device, you may have to use the Add/Remove Hardware utility
in the Control Panel to tell Windows what type of device you are installing.
See the Microsoft Help for additional information.
If Windows 2000 or Windows XP do not detect
the CHANNEL-IN device, you may have to use the Add/Remove Hardware utility
in the Control Panel to tell Windows what type of device you are installing.
See the Microsoft Help for additional information.