Under Options, Click Advanced. The Advanced Printer Options dialog box displays.
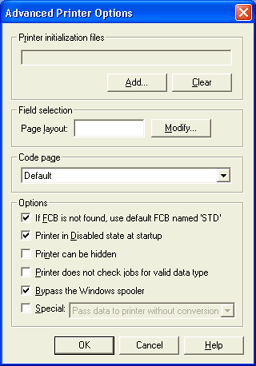
From the Code page list, select the custom code page.
Click OK to exit the Advanced Printer Options dialog box.
Click OK to exit the Printer Properties dialog box.
Custom code pages can be used when you set up BARR/SPOOL printers, send files with Print Utility, view documents, configure RJE devices, and configure LPD print queues. Use one of the following options to activate custom code pages.
Open the Printer Properties dialog box using one of the following methods.
Right-click the printer in the Spool Window and select Configure. To access this option, the printer must be disabled and you must have the Configure - Printer and Disk Settings user access right.
Open the Configuration Utility. From the Spool Printers tab, select the spool printer, and then click Modify.
Under Options, Click Advanced. The Advanced Printer Options dialog box displays.

From the Code page list, select the custom code page.
Click OK to exit the Advanced Printer Options dialog box.
Click OK to exit the Printer Properties dialog box.
Select whether you want to manually or automatically add files with Print Utility and follow the appropriate steps. From the Format tab click Code Pages to select the code page.
Create an override table entry that will force all jobs requiring translation to use a specific code page. This is accomplished by creating an action to change the value of the NDHBCPAG (Code translation page) field to the desired code page number.
For example, use the following steps to apply the custom code page 3030 to all jobs with a job name (NJHGJNAM) of "spanish".
Open the Configuration Utility.
On the Override Table tab, click Add.
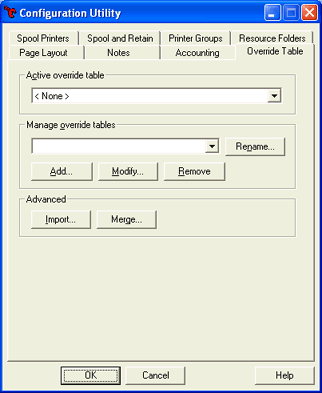
Enter a name for the override table and click OK. The Rules Editor dialog box displays.
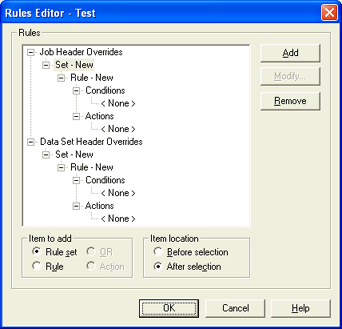
In the Rules box, select Data Set Header Overrides, and then click Add.
Under Conditions, select <None>, and then click Modify. The Rule Conditions dialog box displays.
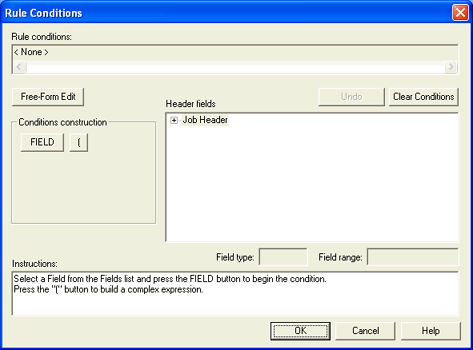
In the Header Fields text box, select Job Header and then General Section.
Select the NJHGJNAM (Job name) field.
Under Conditions construction, click FIELD .
Click the equal (=) button.
Type spanish in the text box and click VALUE.
Click OK to return to the Rules Editor.
In the Rules box, under Actions select <None>, and then click Modify. The Rule Action dialog box displays.
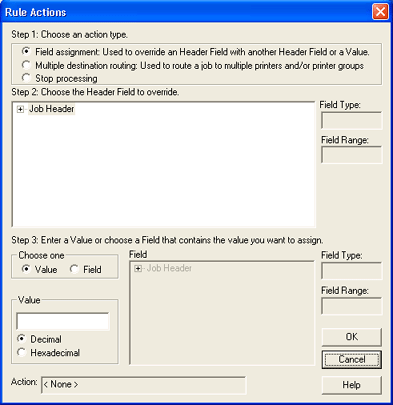
Under Data Set Header choose Internal Custom Section and select the NDHBCPAG (Code translation page) field.
Set the field's Value to 3030.
Click OK several times to close the Configuration Utility.
You can select a custom code page when you assign LPD type properties to LPD print queues.
Open BARR/PRINT TCP/IP.
Click the plus sign (+) next to the queue you want to modify.
Select the LPR control file command you want to modify, and then click Modify | Conversions. The Input Conversion Utility displays.
On the Options tab, click Code Pages to open the Select Code Pages dialog box.
From the Incoming data format or Outgoing data format drop-down lists, select the desired code pages and click OK.
Click OK to close the utility.
You can select a custom code page when you assign LPD type properties to LPD print queues.
Open BARR/PRINT TCP/IP.
Select the Port number, and then click Modify | Conversions. The Input Conversion Utility displays.
On the Options tab, click Code Pages to open the Select Code Pages dialog box.
From the Incoming data format or Outgoing data format drop-down lists, select the desired code pages and click OK.
Click OK to close the utility.