EOM Console
Administrators can use the Alert Rules Manager to create alert rules. Alert rules are configured by selecting an event and then configuring the alert option that will be performed when that event occurs. This is particularly useful for monitoring printer states. Using alert rules, support personnel can be automatically notified when printers have conditions that could prevent end user printing.
Click an option you want to learn more about.

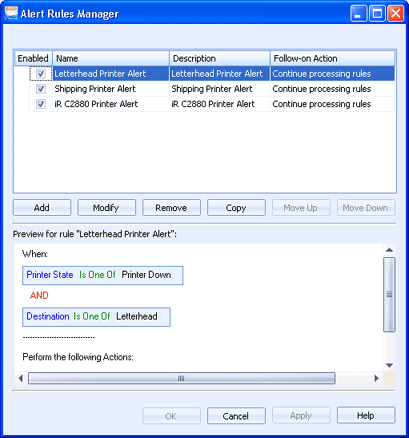
The alert rules grid lists all of the defined alert rules, in the order they will be processed. Selecting a rule will display the rule for preview below the grid. The alert rules grid is editable. Use the following procedures from the rules grid.
Use the check box in the Enabled column to determine if the rule is enabled or disabled.
To change the follow-on action, click in the Follow-on Action cell and select the action you would like to take after this rule has been processed. You can continue processing rules or select not to process any additional rules.
The following buttons display below the grid.
Add button – Creates a new alert rule. Displays the Alert Rule dialog box.
Modify button – Modifies the selected alert rule. Displays the Alert Rule dialog box.
Remove button – Deletes the selected alert rule.
Copy button – Creates a copy of the selected rule. To rename the rule, double-click the rule, or select the new rule and click Modify. The Alert Rule dialog box displays.
Move Up button – Reorders the alert rules by moving the selected rule up.
Move Down button – Reorders the alert rules by moving the selected rule down.
Displays a preview of the selected alert rule.